PIXMA MG3540 Wi-Fi Setup Guide
Some access points (sometimes referred to as routers or hubs) feature an automatic connection button labelled “WPS” which stands for Wi-Fi Protected Setup.
This allows permitted devices such as your PIXMA printer to connect to your network without needing to enter a password and it enables a quick and easy method of connecting your devices.
This method is by far the easiest way of connecting your PIXMA printer so if your access point has a WPS button please select ‘WPS Connection Method’ below for instructions on connecting using this method.
If your access point does not support WPS we have provided alternative instructions to get your PIXMA printer connected so please select 'Standard Connection Method' below.
WPS Connection Method
Before we start, there are some conditions that must be met in order to use the WPS push button method:
-
The access point must have a physical WPS push button available.
Please check with your device’s user guide for details.
If the WPS push button is not available please use the instructions in the Standard Connection Method.
-
Your network must be using the WPA (Wi-Fi Protected Access) or WPA2 security protocol. Most WPS enabled access points use this protocol.
Step 1
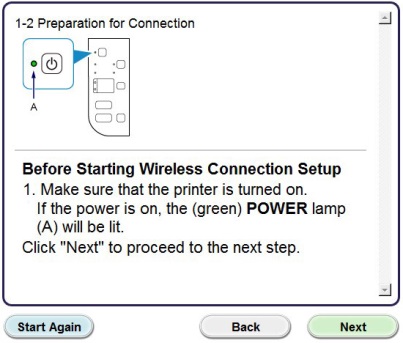
Make sure that the printer is turned on.
Press & hold the [Wi-Fi] button  on the top of the printer until the alarm lamp flashes once.
Step 2
Make sure that the lamp next to this button starts to flash blue and then go to your access point and press the [WPS] button within 2 minutes.
For exact details on starting WPS on your access point, please refer to its user guide.
The (blue) Wi-Fi lamp on the printer will continue flashing while searching, and the power and Wi-Fi lamp will flash when connecting to the access point.
When the printer has successfully made a connection to your wireless network, the power and Wi-Fi lamp will stop flashing and remain lit.
Network settings confirmation
To confirm that your printer is successfully connected to your wireless network, you can print out the network settings of your printer if you wish:
1. Make sure that your printer is turned on.
2. Load a sheet of A4 or letter-sized plain paper.
3. Press & hold the [Resume/Cancel  ] button until the alarm lamp
  flashes 15 times, and then release it.
The network information page will be printed.
When referring to the printout, check that the “Connection” indicates “Active” and that the SSID - Service Set Identifier (the name of your wireless network) indicates the correct name of your wireless network.
This concludes the WPS setup procedure.
Please now proceed by installing the software to make the most out of your PIXMA MG3540.
If you do not have the installation CD that came with your product, please download the manuals and software to continue.
If the WPS wireless setup is still failing after following this guide, please contact us for further assistance.
Standard Connection Method
Step 1
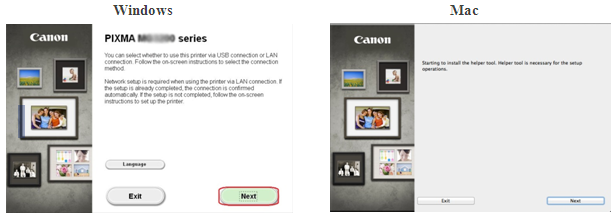
1. For Windows users, insert the CD that came with your printer and run the setup.
If you do not have the installation CD that came with your product or you are a Mac user, please download the manuals and software to continue.
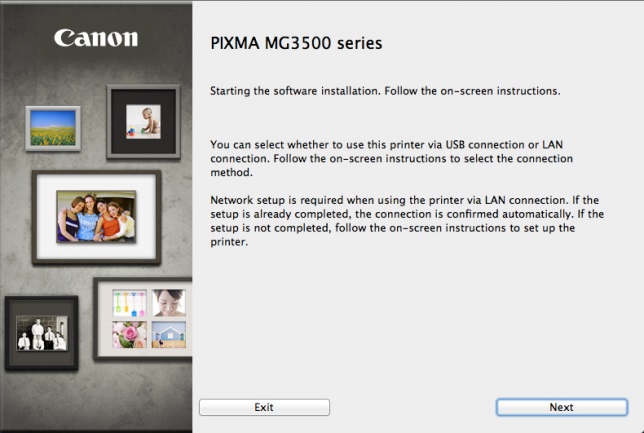
2. When the initial screen appears, click on [Next].
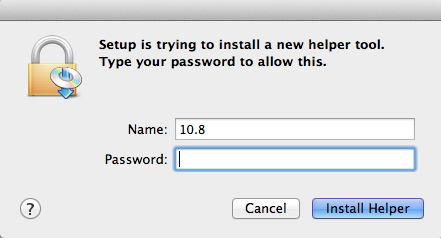
<Mac users only>
When the following screen appears, type your password to allow the helper tool to be installed, then click on [Install Helper]
When the following screen appears, click on [Next]
Please note: A screen will be displayed asking you to select between a USB or wireless connection, please select [Wireless Connection].
3. Ensure that your printer is turned on, make sure the power lamp is on and then click [Next].
Step 2
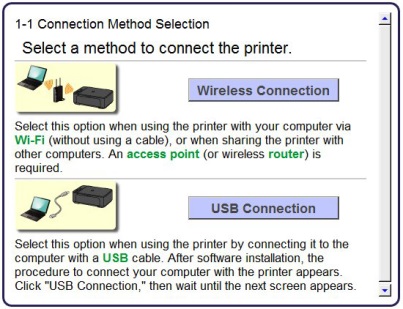
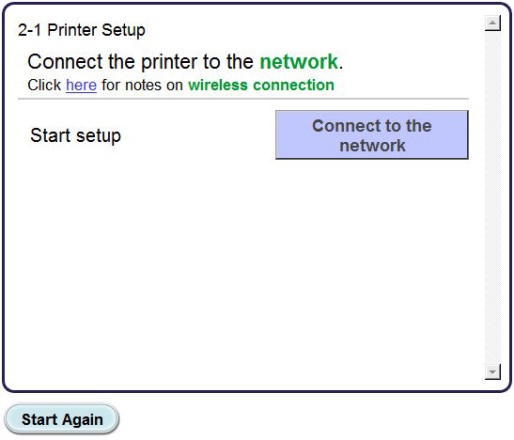
1. Click [Connect to the network].
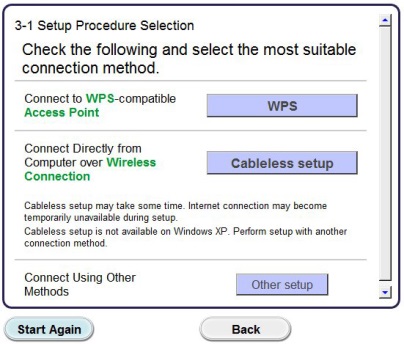
2. When the following screen appears, click [Cableless setup].
Please note: For Windows XP users the cableless install method is not supported, please select the [Other setup] method, then proceed to step 5.
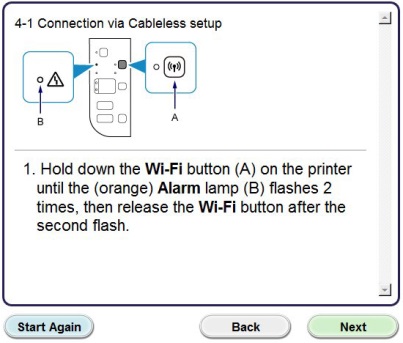
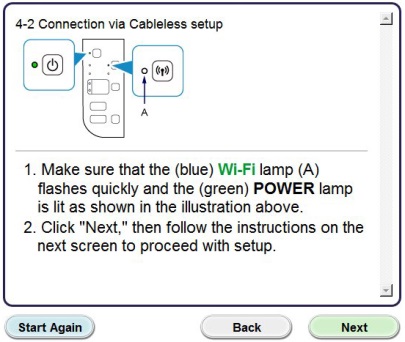
3. When the [Connection via Cableless setup] screen appears, hold down the printer’s [Wi-Fi] button (A) until the orange alarm lamp (B) flashes 2 times, then release after the second flash.
4. Confirm that the (blue) Wi-Fi lamp (A) flashes quickly and the (green) power lamp is lit. Click [Next].
Please Note: Your network connection will be temporarily disabled during the setup.
Click [Next].
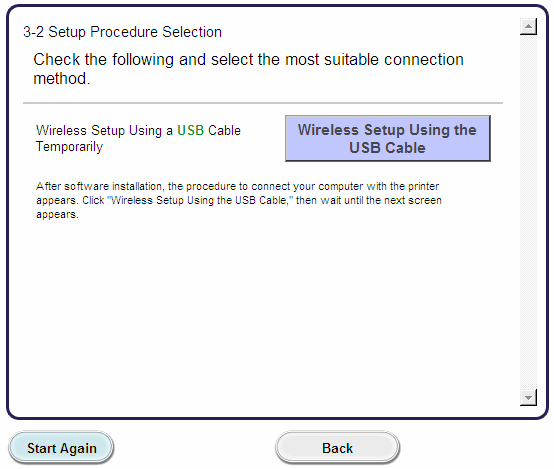
5. Windows XP users only, select [Wireless Setup Using the USB Cable]
Step 3
1. When the following screen appears, select your region, and then click on [Next].
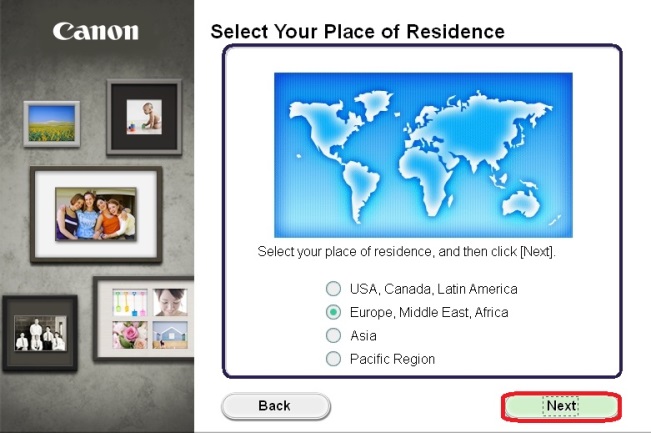
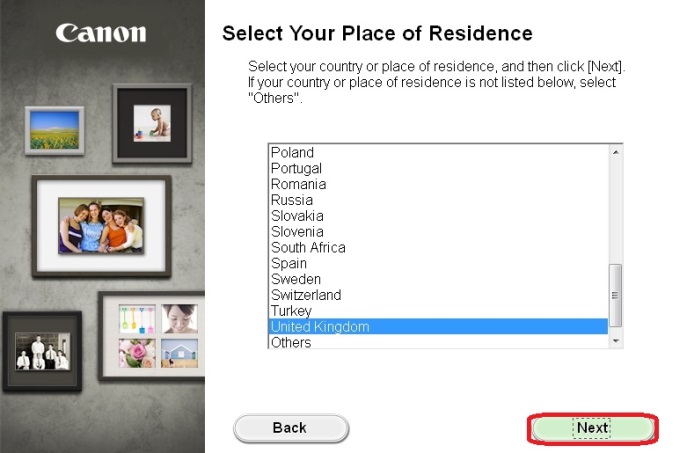
2. When the following screen appears, select your place of residence and then click on [Next].
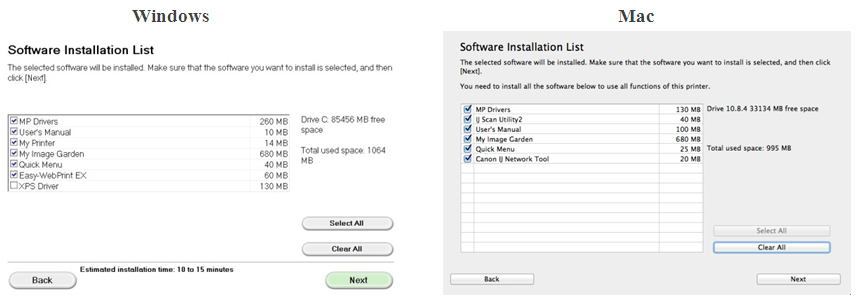
3. When the following screen appears, select the software you wish to install and then click on [Next]. If you’re not sure which software you want to install at this stage, don’t worry, as you can always uninstall it at a later stage if you wish.
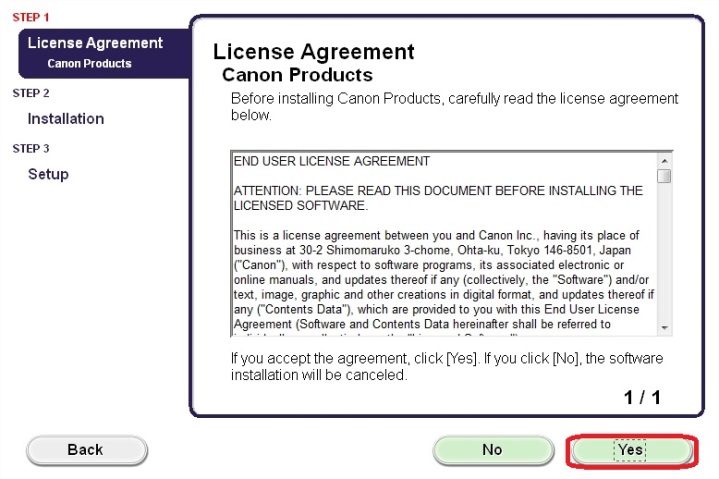
4. When the following screen appears, click on [Yes] to agree to the end user license agreement.
<Windows users only>
When the following screen appears, click on [Next].
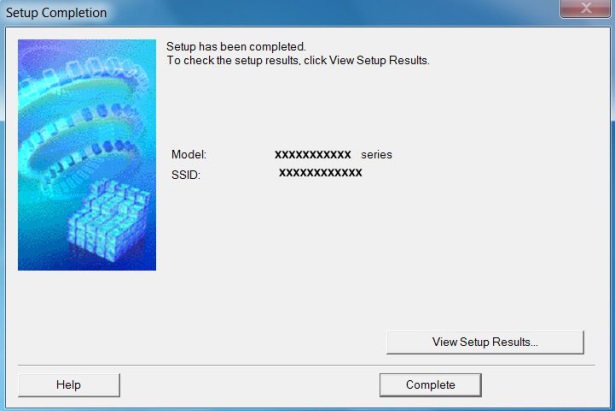
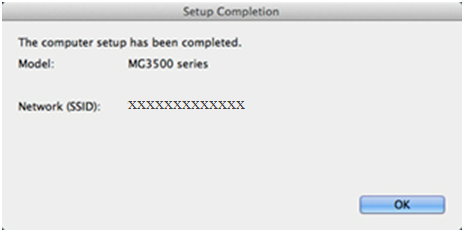
5. The following screen indicates the model of your printer and the name (or SSID) of your wireless network.
Windows (excluding Windows XP Users)
Click [Complete].
This concludes the Windows Cableless setup.
For Windows XP users, or users where the printer could not be detected, please continue with the USB installation detailed in step 6.
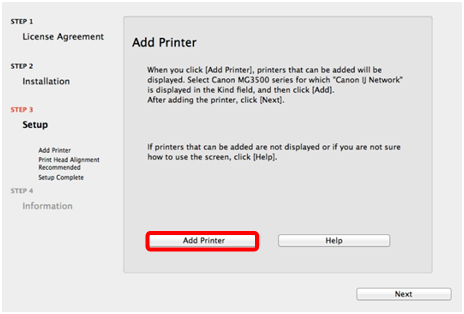
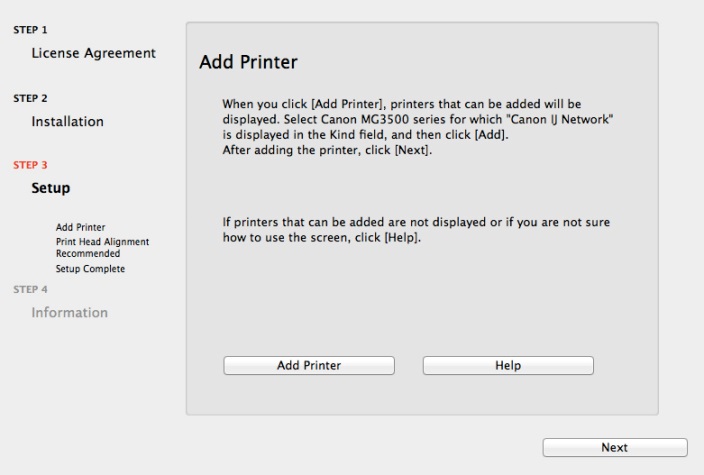
<Mac users only>
When the following screen appears, click on [Add Printer]
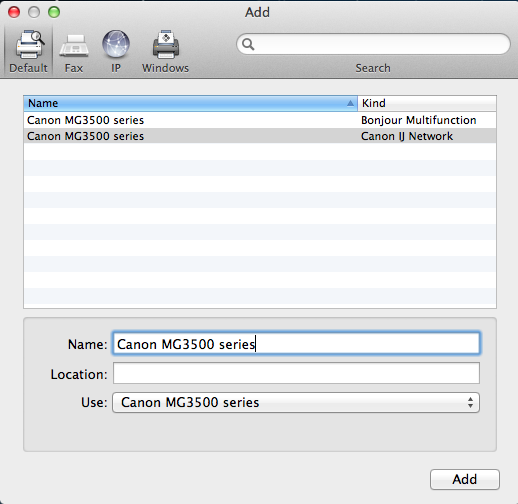
In the following screen, select the [Canon IJ Network] driver version and click [Add].
Click [Next] to complete the setup.
This concludes the Mac Cableless setup.
For users where the printer could not be detected, please continue with the USB installation detailed in step 6.
USB cable setup for Windows XP users and where the network connection was not detected
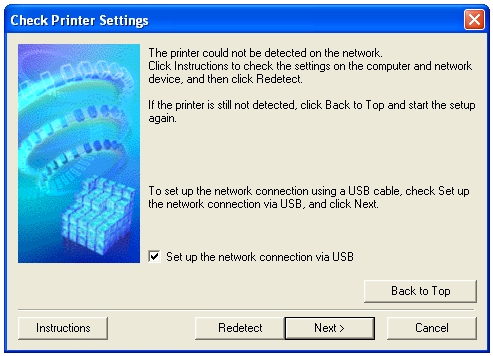
6. Select [Set up network connection via USB], then click [Next].
7. When the following screen appears, connect your printer to your computer using the supplied USB cable. This is the cable with the  symbol on the connector.
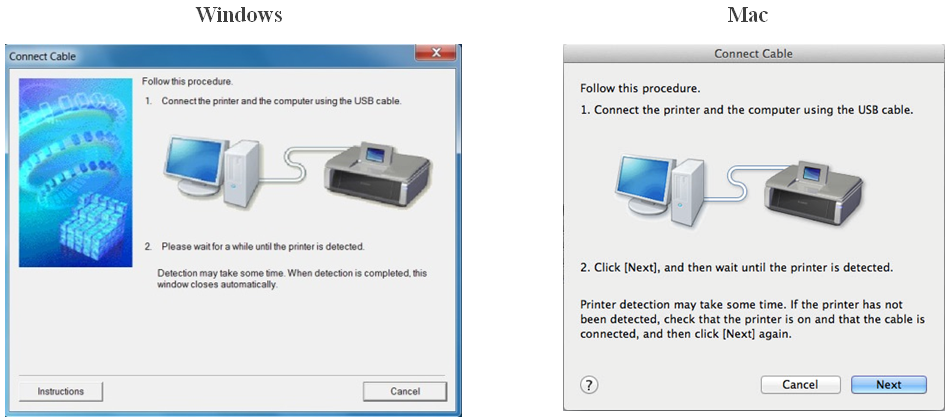
For Mac users, click [Next].
8. Once your printer has been detected, the following screen will appear.
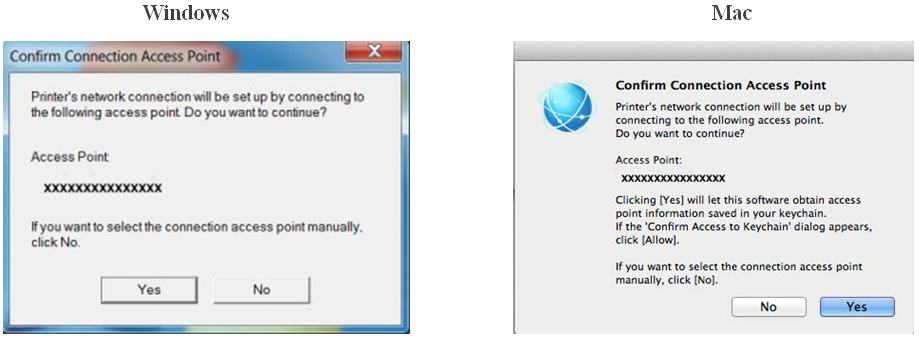
The name of the access point that your computer is connected to will be displayed (where “xxxxxxxxxxxxx” is shown).
If this is the wireless network you want your printer to connect to, click on [Yes].
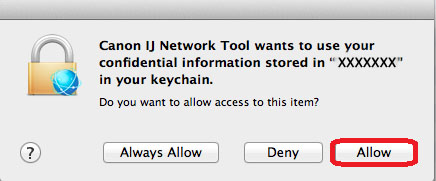
<For Mac users only>
When the following screen appears, click [Allow].
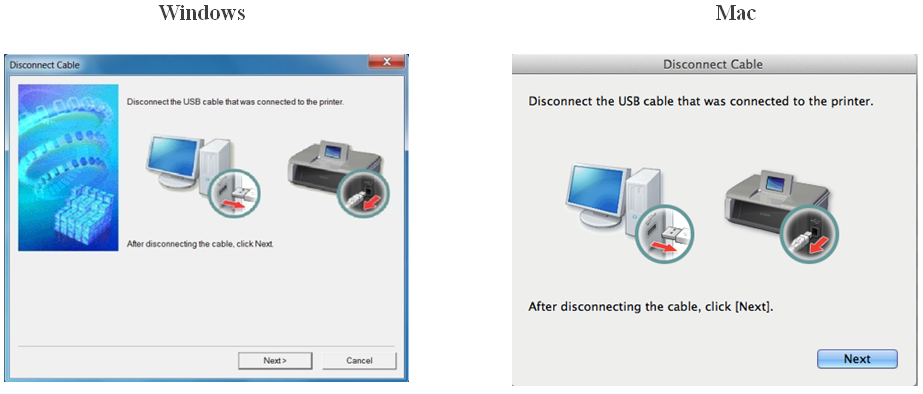
9. When the following screen appears, disconnect your printer from your computer and click [Next].
<Windows Only>
When the following screen appears, click [Complete].
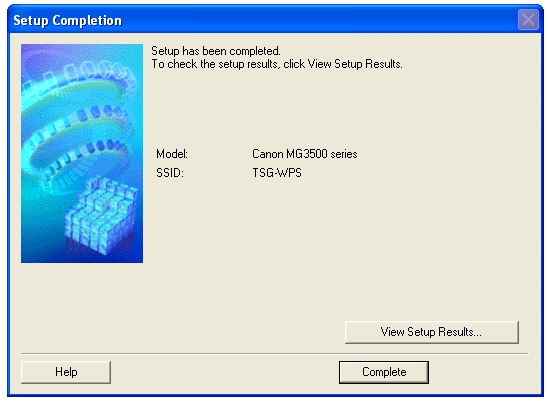
This concludes the Windows setup.
<For Mac users only>
Once your printer has been detected, the following screen will appear indicating the name of the access point that your computer is connected to (where “xxxxxxxxxxxxx” is shown). Click [OK].
When the following screen appears, click [Add Printer].
In the following screen, select the [Canon IJ Network] driver version and click [Add].
Click [Next] to complete the setup.
This concludes the Mac setup.
If the wireless setup is still failing after following this guide, please contact us for further assistance.
Restoring Network Settings to Factory Default
If you need to reset your network settings back to factory default, for example if you change your access point, you can do so by following these instructions.
Please note that initialisation erases all network settings on the machine, so printing or scanning from a computer over the network will become impossible until the printer is re-configured with new network settings.
Follow the procedure below to initialise the network settings:
1. Press and hold the [RESUME/CANCEL ] button until the alarm lamp flashes 17 times.
2. Release the [RESUME/CANCEL ] button.
The network settings have been reset back to factory default settings.
If this process is still failing after following this guide, please contact us for further assistance.