PIXMA MG5440 Google Cloud Print Setup Guide
Requirements for printing with Google Cloud Print- You must have an active Google Account to be able to register your printer with Google Cloud Print and your username and password will be required to complete this setup. If you do not have an active Google Account, please visit the Google Account registration page and follow the on-screen instructions to create an account.
- To use the Google Cloud Print service, your printer must be connected to the Internet. If you need assistance with setting up this connection, please view the PIXMA MG5440 Wireless Connection Setup Guide.

Registering your printer
Please follow the instructions below to register your printer with Google Cloud Print.- Make sure that your printer is switched on, connected to your network and that your network has a working Internet connection.
- Press the [Home] button

- Use the arrow keys to display [Web Service] then press the right function button to select it.

(The function buttons are beneath the LCD display). - Using the arrow keys, select [Web Service Setup] and press [OK].
- Using the arrow keys, select [Cloud Settings] and press [OK].
- When [Google Cloud Print Setup] is displayed, press [OK].
- When [Register with Google Cloud Print] is displayed, press [OK].
- When [Register this printer with Google Cloud Print?] is displayed, select [Yes] and press [OK].
- Select your preferred display language for the print settings of Google Cloud Print and press [OK].
- Press [OK] to print out the authentication page. Please ensure that you have loaded an A4 sheet of plain paper into your printer.
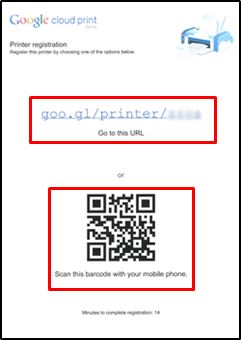
The authentication page should now print and your printer will ask if the page was successfully printed. If it was, select [<Yes>] and press [OK]. If not, select [<No>] to reprint the authentication page. - On the printed authentication page there will be a unique URL for your printer in the location highlighted below, type this URL into the address bar of your web browser. Alternatively you can scan the QR code using a QR code reader App on your smartphone or tablet.
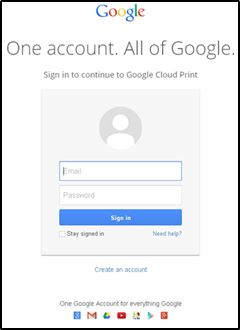
- To register your printer with Google Cloud Print you will be asked to log into your Google Account using your Google e-mail address and password. This step must be completed within 14 minutes, if you cannot complete this within 14 minutes you will need to repeat steps 1-10.
- Once you have registered your printer with the Google server, the following will be displayed on the screen of your printer:
[Registration with Google Cloud Print completed.
Email
<Your email address>@gmail.com
Printer name
Canon MXxxx series_xxxxxx”]
Press [OK] to finish the registration. - Press the [Home] button to return to the home screen.
Google Cloud Print™ is a registered trademark of Google Inc.
De-registering your printer
If you no longer wish to use your printer with the Google Cloud Print service, you can de-register it by carrying out the following instructions:- Make sure that your printer is switched on, connected to your network and that your network has a working internet connection.
- Press the [Home] button
- Use the arrow keys to display [Web Service] then press the right function button to select it.
(The function buttons are beneath the LCD display). - Using the arrow keys, select [Web Service Setup] and press [OK].
- Using the arrow keys, select [Cloud Settings] and press [OK].
- When [Google Cloud Print Setup] is displayed, press [OK].
- Select [Delete from Google Cloud Print] and press [OK].
- When [Unregister from Google Cloud Print?] is displayed, select [Yes] and press [OK].
- When [Unregistered from Google Cloud Print] is displayed, press [OK].
- Touch the [Home] icon to return to the home screen.
If you are experiencing an issue with de-registering with Google Cloud Print please contact us for assistance.
Google Cloud Print™ is a registered trademark of Google Inc.

 Canon
CanonHave Your Say
Please complete a 1 minute survey to help us improve our support website experience