Saving Images to a Computer with CameraWindow 8.10 (or later)
FAQ ID: 8202450100
Release date: 05 October 2017
Solution
IMPORTANT
- Please make sure to install [CameraWindow 8.10 (or later)] on your computer beforehand.
- Depending on the camera model, a USB cable may not be included with the camera. If you do not own a USB cable, please purchase one separately.
- In this section, Windows 7 is used as an example. The on-screen displays and operations may differ depending on the operating system.
NOTE
The following two types of USB cables are available for compact digital cameras:
*For more information about the type of USB cable that can be used with your camera, please refer to the camera’s instruction manual.
- Camera end: Mini-B (IFC-400PCU)
- Camera end: Micro-B (IFC-600PCU)
Connect the Camera to the Computer
1. Connect the <DIGITAL> terminal of the camera to the computer's USB port using a USB cable.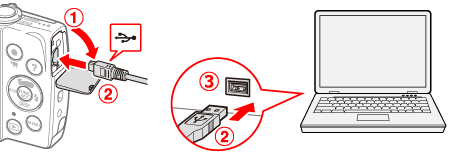
 <DIGITAL> terminal (Camera)
 USB cable
 USB port (Computer)
IMPORTANT
Example procedures are shown on the PowerShot A2600/PowerShot A2500. The position and shape of the operation buttons, screens displayed, and setting items may differ according to the model you use.
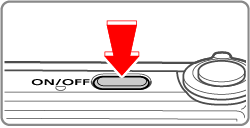
2. Press the power button to turn the camera on.
REFERENCE
- If using Mac OS X
When the camera and computer become capable of communicating, CameraWindow will start. Proceed to the "Operate CameraWindow" section below.
3. Click the ( ) icon displayed in the [Taskbar].
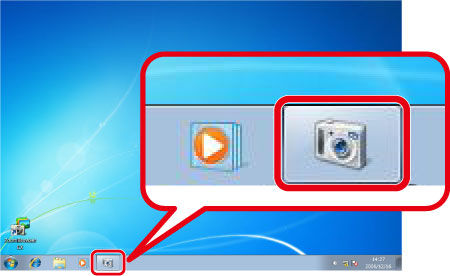
4. The following window appears.
Click [Change Program] under [Import pictures and videos] ( ).
).
NOTE
If [Downloads Images From Canon Camera] (
 ) is already selected, proceed to Step 6.
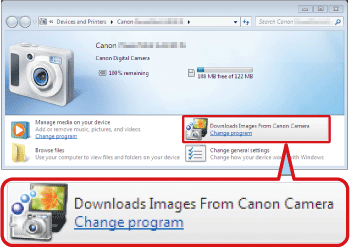
5. The following window appears.
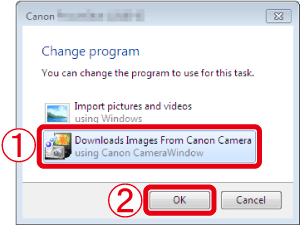
Select [Downloads Images From Canon Camera], and click [OK].
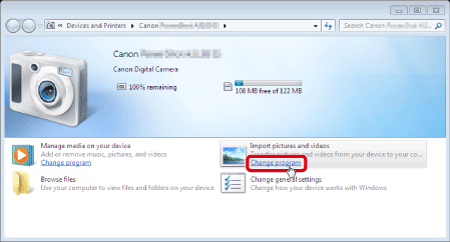
6. Clicking [OK] in the previous step returns you to the screen shown below.
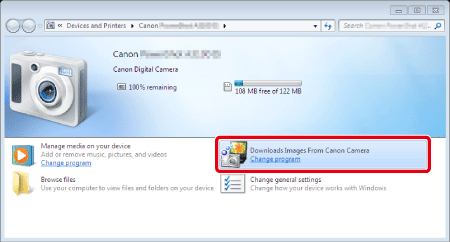
Double-click [Downloads Images From Canon Camera].
Operate CameraWindow
1. The following window appears.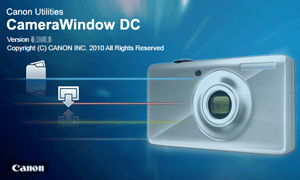
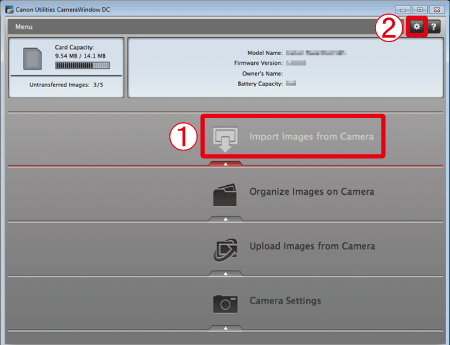
2. The [CameraWindow] menu appears. Click [Import Images from Camera].
REFERENCE
By default, the imported images will be saved separated by each shooting date in the picture folder.
To change the destination folder, click
( )in the upper-right corner of the window shown in Step 2, and then follow the procedure below.
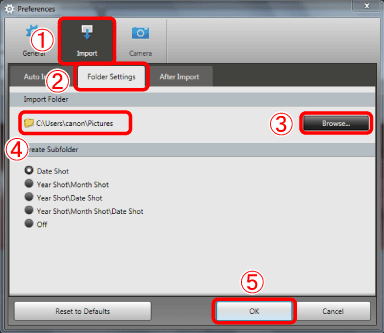
Click
[Import] > [Folder Settings] > [Browse], and specify a folder as the destination folder.Confirm the destination folder
 that you have specified.
Then, click
 [OK].
[OK].
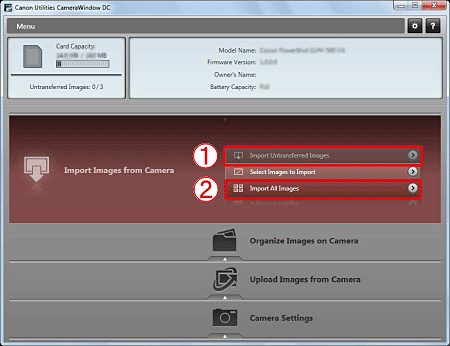
3. A window like the one shown below appears, so click [Import Untransferred Images] or [Import All Images].
REFERENCE
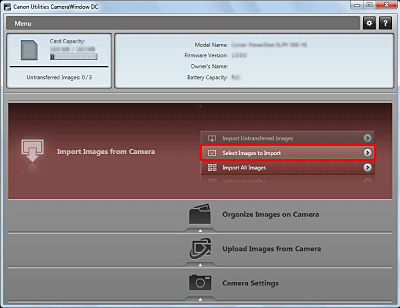
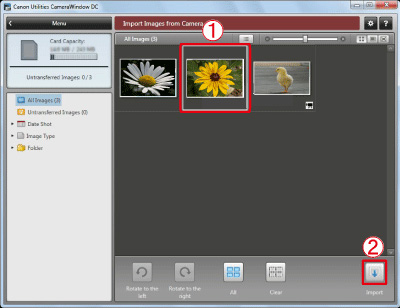
3-1. To select and import images, click [Select Images to Import] in Step 3.
3-2. Select
the images you want to import, and then click [Import] ( ).
). 
3-3. The software starts importing images. After this step, please follow the subsequent procedures below.
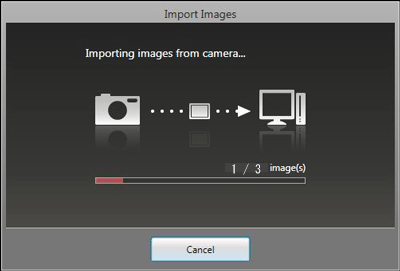
4. The following window appears, and the computer starts to transfer images from the camera.
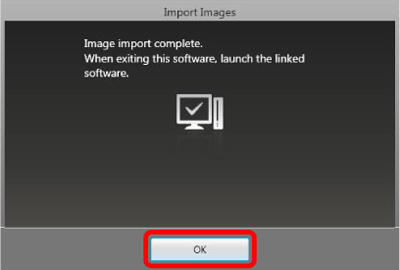
5. The following screen appears, so click [OK].
6. Clicking [OK] returns you to the screen in step 3.
Press [  ] to close this window.
Applicable Models
- IXUS 160
- IXUS 170
- IXUS 175
- IXUS 177
- IXUS 180
- IXUS 182
- IXUS 185
- IXUS 190
- IXUS 275 HS
- IXUS 285 HS
- PowerShot G1 X Mark III
- PowerShot G3 X
- PowerShot G5 X
- PowerShot G7 X Mark II
- PowerShot G9 X
- PowerShot G9 X Mark II
- PowerShot SX410 IS
- PowerShot SX420 IS
- PowerShot SX430 IS
- PowerShot SX432 IS
- PowerShot SX530 HS
- PowerShot SX610 HS
- PowerShot SX620 HS
- PowerShot SX710 HS
- PowerShot SX720 HS
- PowerShot SX730 HS